Why Getting to Supai Is Part of the Adventure
One of the questions I hear the most about Supai is simple: “So… how do you actually get there?”
The answer isn’t simple. Supai, home to the Havasupai Tribe and their turquoise waterfalls, is the most remote village in the United States. You can’t drive there, and you certainly can’t just “drop by” on a weekend road trip. Getting to Supai is half the adventure—it’s a test of patience, planning, and preparation.
I still remember the first time I planned my trip. I looked at the map and realized there were no roads into Supai. No rental cars, no shuttle buses. Just an 8-mile trail snaking down from a parking lot called Hualapai Hilltop. That was the moment it hit me: visiting Supai isn’t like going anywhere else.
In this guide, I’ll take you step by step through the process of getting to Supai:
How to drive to the trailhead
The different ways to reach the village (hiking, mule, helicopter)
The permit and reservation system
What to pack and how to prepare
Tips to make the journey smoother and safer
By the end, you’ll not only know how to get to Supai AZ, but you’ll also be ready to enjoy every step of the journey.
Step 1: Getting to Hualapai Hilltop
Every journey into Supai begins at the Hualapai Hilltop trailhead. It’s the gateway into the canyon and the only place where the trail to Supai begins.
Driving Directions
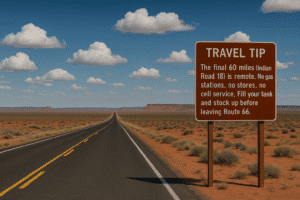
From Phoenix, AZ – About 5 hours (200 miles). Take I-17 N to I-40 W, then Route 66 through Peach Springs, and finally Indian Road 18 for 60 miles to the hilltop.
From Las Vegas, NV – About 4.5 hours (210 miles). Take US-93 S to I-40 E, then Route 66 and Indian Road 18.
From Flagstaff, AZ – About 3.5 hours (165 miles). Take I-40 W and Route 66 through Peach Springs.
What You’ll Find at Hualapai Hilltop
A large parking lot (often full—arrive early)
Mule loading area
Helicopter landing zone
Vault toilets
No water, food, or services
When I first pulled into Hualapai Hilltop, it felt like the edge of the world. The canyon stretched out in front of me, silent and endless, and the reality set in: from here, it’s all on foot, mule, or helicopter.
Hiking Into Supai Village
Why Hiking Is the Classic Way to Reach Supai
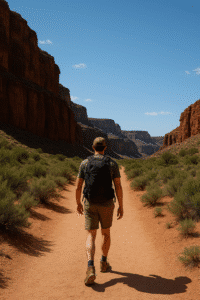
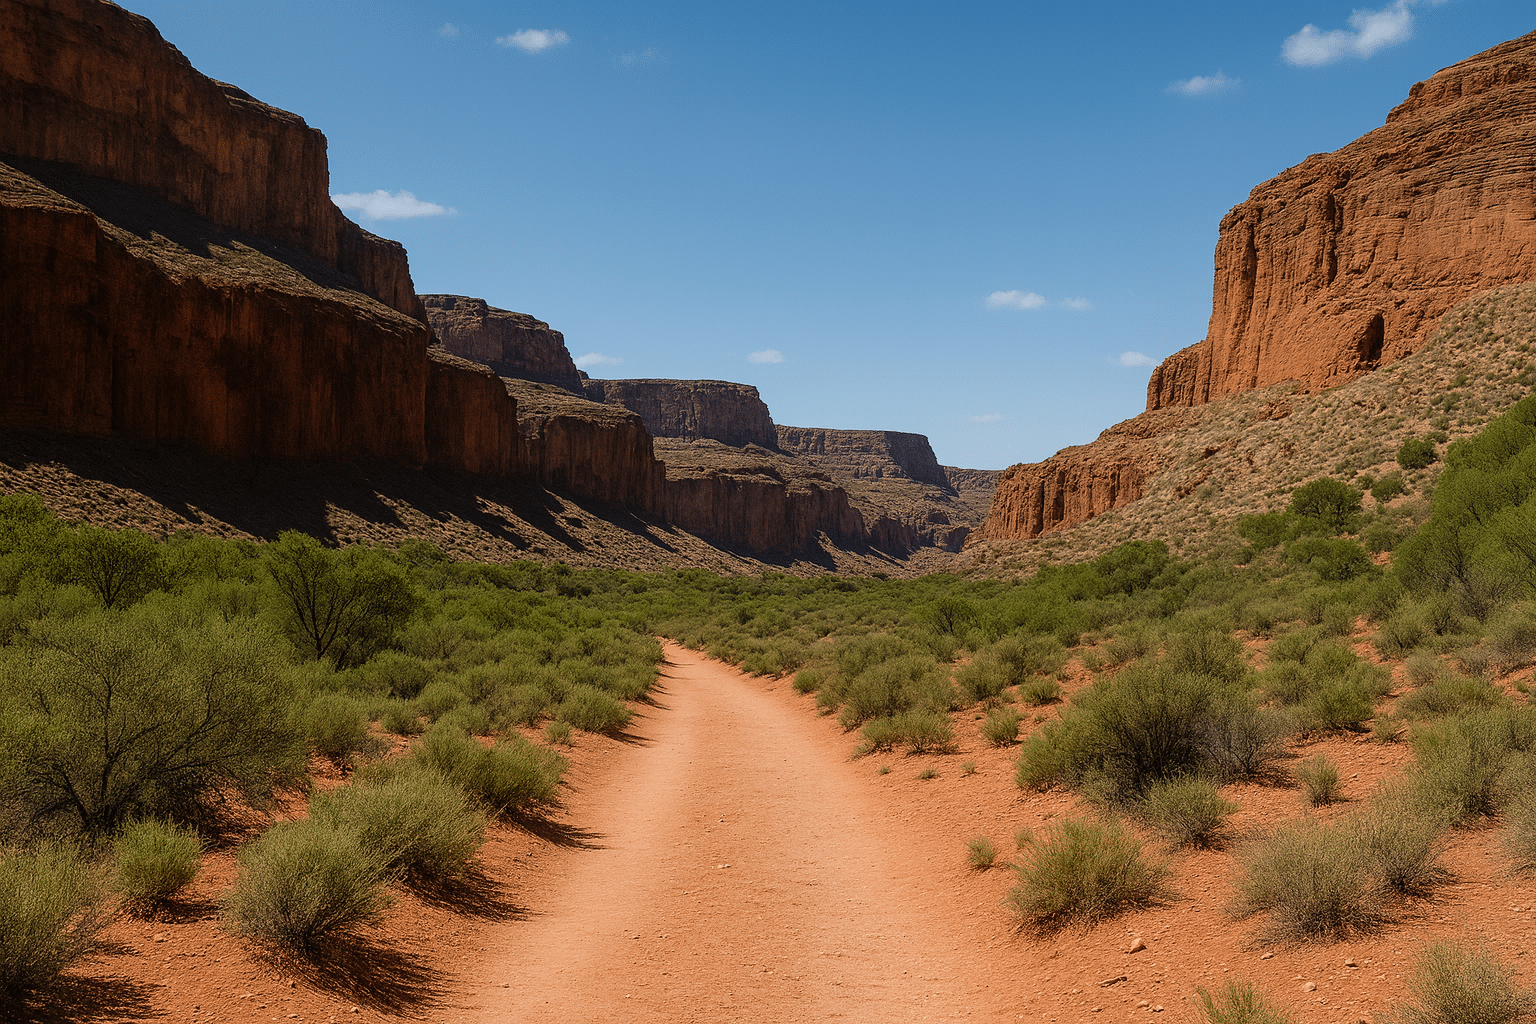
Most people get to Supai the old-fashioned way: by walking. The 8-mile trail from Hualapai Hilltop into the village is more than just a route—it’s part of the story. It winds through red-rock canyons, follows sandy creek beds, and slowly leads you into one of the most remote communities in America.
When I first stepped onto the trail, I felt a mix of excitement and nerves. I’d read stories about how tough the hike could be, especially the climb back out. But as the sun rose over the canyon walls and mule trains passed me on the switchbacks, I realized this wasn’t just about reaching a destination. It was about earning it.
Trail Details
Distance: 8 miles one way to Supai Village
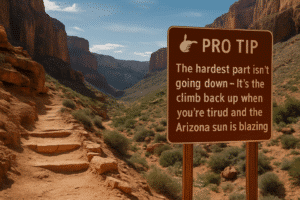
Elevation Change: 2,000 feet (downhill going in, uphill on the way out)
Time Required: 4–6 hours depending on pace and fitness
Trail Conditions:
First 1.5 miles: steep switchbacks down the canyon wall
Middle section: sandy, flat canyon floor
Final stretch: winding trail into the village
What You’ll See on the Trail
The hike is stunning in ways photos can’t capture.
Towering red canyon walls
Mule trains carrying mail and supplies
Narrow canyon passages where silence echoes
Occasional glimpses of desert wildlife (lizards, birds, bighorn sheep if you’re lucky)
One of my favorite moments was about halfway in, when the canyon floor opened up and I caught my first glimpse of cottonwood trees along Havasu Creek. That was the sign that Supai was near.
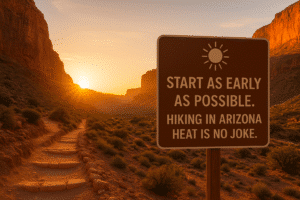
When to Start the Hike
Early Morning (5–7 a.m.) – Best time. Cooler temps, shade, and more energy.
Midday (10 a.m.–2 p.m.) – Risky. The canyon floor heats up, and there’s little shade.
Late Afternoon/Evening – Dangerous. Darkness falls quickly, and the trail isn’t lit.
Safety Tips for the Hike
Carry Enough Water: Minimum of 3 liters per person.
Use Trekking Poles: Helpful on the steep descent and climb back out.
Protect Yourself from the Sun: Wide-brim hat, sunscreen, lightweight clothing.
Pack Snacks: Trail mix, jerky, protein bars for energy.
Don’t Rush: It’s not a race. Rest in shaded areas when needed.
My Personal Experience
On my first hike down, I underestimated how tiring the sandy trail could be. By mile 6, my legs felt like lead. Then I heard the bells of a mule train and stepped aside as they passed, dust swirling in the air. Watching the mules reminded me: this is the same trail used for centuries to sustain Supai life. It gave me a new appreciation for the effort.
The return hike was even tougher. The switchbacks at the end felt endless, and I had to stop multiple times to catch my breath. But when I finally reached Hualapai Hilltop, sweaty and dusty, I felt like I’d conquered something big.
What Other Travelers Say
“The hike in was beautiful, the hike out was brutal. Bring more water than you think you’ll need.” – TripAdvisor
“It took us 5 hours with lots of breaks. The canyon scenery kept us going.” – TripAdvisor
“We saw people who looked unprepared and struggling. Don’t underestimate this trail.” – TripAdvisor
Alternatives for Gear
Mule Service: If you don’t want to carry a heavy pack, you can hire a mule to transport your gear for around $132 each way.
Pack Light: Even if you hire a mule, carry a daypack with essentials (water, snacks, first aid, camera).
Other Ways to Get to Supai
Why Alternatives Exist
Not everyone can (or wants to) hike the 8 miles into Supai. Some travelers have kids, health concerns, or simply prefer to save their energy for exploring waterfalls. Thankfully, there are alternatives: mule rides and helicopter flights. Both have their quirks, but each provides a unique way to experience the journey.
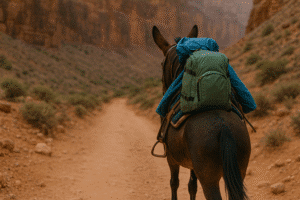
Mule Service – Supai’s Traditional Transport
Mules are more than just tourist options here—they’re essential to Supai life. Six days a week, mule trains carry mail, food, and supplies up and down the canyon. They’re the lifeline of the village.
Riding a Mule
Distance: 8 miles, same as hiking trail
Time: 3–4 hours depending on conditions
Booking: Must reserve in advance through Havasupai Tribe
Cost: Around $200–$250 per person (prices vary by season)
When I saw my first mule train, dust rising in the canyon, I felt like I’d stepped back in time. Riders swayed gently in their saddles while the mules moved steadily, unbothered by the heat. It looked rugged but surprisingly comfortable.

Gear Transport by Mule
Even if you don’t ride, you can hire a mule to carry your bags.
Cost: $132 each way per mule (up to 4 bags, 32 lbs max per bag)
Drop-off: Bags are tagged at Hualapai Hilltop and picked up in Supai Village or campground
👉 I did this on my second trip, and it made the hike infinitely easier. Walking with just a daypack while my camping gear bounced its way down the canyon on a mule was worth every dollar.
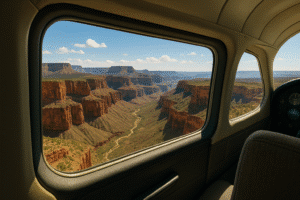
Helicopter Service – Flying Into Supai
For those who want speed and an unforgettable view, the helicopter is an option.
Airwest Helicopter Basics
Operator: Airwest Helicopters
Route: Hualapai Hilltop → Supai Village
Schedule: Typically runs Thursdays, Fridays, Sundays, and Mondays (weather permitting)
Cost: Around $85–$100 per person one way
Time: 10 minutes
When the helicopter roared overhead on my first trip, the canyon shook with sound. Watching it land in Supai Village was surreal—locals, supplies, and the occasional traveler all disembarking in a flurry of dust.
How to Book the Helicopter
Sign Up in Person: No online reservations. You must put your name on the list at Hualapai Hilltop.
Priority Goes to Locals: The helicopter primarily serves the Havasupai Tribe. Tourists are secondary.
Be Ready to Wait: You could wait hours depending on demand and weather.
Weight Limits Apply: Travel light, as baggage is restricted.
Pros & Cons
Mule Ride Pros:
Unique, traditional experience
Saves energy for exploring waterfalls
Great for kids and non-hikers
Mule Ride Cons:
Bumpy and dusty
Expensive
Requires advance booking
Helicopter Pros:
Fastest way to reach Supai
Incredible aerial views
Lower cost than mule ride
Helicopter Cons:
Unreliable schedule (weather + priority for locals)
Long waits possible
Limited baggage
Traveler Experiences
“The mule ride was tougher on my legs than I thought, but it saved me from carrying my pack. Worth it.” – TripAdvisor
“The helicopter was amazing! Ten minutes of breathtaking scenery. Just be prepared to wait.” – TripAdvisor
“We waited five hours for the helicopter. If you’re not patient, hike instead.” – TripAdvisor
My Take
If you’re physically able, I recommend hiking in at least once. It gives you a true sense of Supai’s remoteness. But if you need an alternative—or just want to experience something different—mules and helicopters are unforgettable in their own right.
Personally, I’d hike in and then take the helicopter out. That way, you earn your entry but save your energy on the brutal uphill climb.
Permits & Reservation System
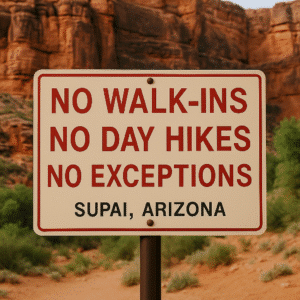
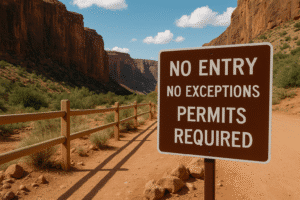
Why Permits Are Mandatory
Supai isn’t like other destinations where you can show up and hope for the best. Because it’s on the Havasupai Reservation, access is strictly controlled. Permits are not only about managing crowds—they also protect the land, respect tribal sovereignty, and ensure safety.
I learned this firsthand when I tried to plan a last-minute trip. I figured I could just “call someone” and work it out. Wrong. Without a permit, you won’t make it past the trailhead. Rangers check every visitor.
Where to Book
Official Website: Havasupai Reservations
When Reservations Open: Typically February each year
Minimum Stay: 3 nights (bundled package, no single nights)
What’s Included: Entry permit, camping or lodge reservation, environmental fees
Cost of Permits
Camping Permit: $375–$500 per person (covers 3 nights, mandatory bundle)
Lodge Permit: $200–$250 per night, plus permit fees (3-night minimum)
Extras: Mule service, helicopter fees, food, and gear are not included
While it may feel pricey, the reality is Supai is remote, difficult to maintain, and the money directly supports the Havasupai community.
How to Book Successfully
Create an Account in Advance
Don’t wait until the morning of reservations. Set up your login ahead of time.
Know the Date & Time
Permits open once a year, and within hours, nearly everything is gone.
Have Backup Dates
Popular weekends go first. Midweek is easier.
Book the Whole Package
You can’t split nights or shorten the stay. It’s 3 nights, period.
Print Confirmation
Bring a paper copy to Hualapai Hilltop. Rangers won’t accept just a screenshot.
Transfer & Cancellation Rules
No Refunds: All sales are final.
Transfers Allowed: You can transfer permits through the official site if you can’t go.
Scam Warning: Do not buy permits on Facebook groups or Craigslist. Stick to the official platform.
Common Mistakes Travelers Make
Waiting Too Long: Permits sell out in hours, sometimes minutes.
Not Coordinating With Friends: If traveling in a group, book at the same time to ensure you’re together.
Forgetting Mule Reservations: These must be booked separately and also sell out.
Underestimating Costs: Permits cover entry, not meals, transport, or gear.
TripAdvisor Voices
“We stayed up until midnight refreshing the site. Got in by sheer luck. Be prepared—it’s stressful but worth it.” – TripAdvisor
“Don’t bother with Facebook sellers. My friend lost $400 on a fake permit.” – TripAdvisor
“Book the moment it opens. We missed out one year and had to wait until the next season.” – TripAdvisor
Why the System Feels Tough (But Fair)
It’s easy to feel frustrated when permits vanish so quickly. But when you finally reach Supai, you understand why. The canyon can’t handle thousands of visitors a day. The tribe controls access to preserve the beauty, culture, and safety of their home.
When I walked through the village, I felt grateful that only a limited number of us were there. It made the experience quieter, more respectful, and more magical.
Packing & Preparation
Why Preparation Makes or Breaks Your Trip
Supai isn’t a place where you can “just wing it.” Once you start the hike down from Hualapai Hilltop, there are no stores, no gas stations, no rescue shuttles. Everything you need, you have to carry—or arrange to be carried by mule.
On my first trip, I thought I had packed well. By mile 5, I realized I’d forgotten electrolytes. By mile 7, I was rationing water. Lesson learned: preparation isn’t optional—it’s survival.
Essential Packing List
Here’s a breakdown of what you must bring for a safe and enjoyable trip.
Hiking Essentials
Backpack: Lightweight, comfortable, with good hip support
Water Capacity: At least 3 liters (hydration bladder recommended)
Trekking Poles: Helpful for switchbacks and sandy trails
Headlamp/Flashlight: For early or late hiking
Clothing
Breathable Layers: Lightweight shirts, shorts, and pants
Hat & Sunglasses: Desert sun is harsh
Rain Jacket: Especially during monsoon season (July–September)
Swimsuit & Water Shoes: For waterfall swimming and creek crossings
Warm Layers: Nights can drop into the 40s°F even in summer
Footwear
Hiking Boots: Sturdy, broken-in, with ankle support
Camp Sandals/Water Shoes: For relaxing and wading
Food & Cooking
Dehydrated Meals: Lightweight and easy to cook
Snacks: Trail mix, jerky, granola bars, fruit leather
Stove & Fuel: Compact camping stove (no open fires allowed)
Cookware & Utensils: Collapsible pot, spork, lighter
Sleeping (If Camping)
Tent: Lightweight, weather-resistant
Sleeping Bag: Rated for desert nights (40°F or lower)
Sleeping Pad: Comfort and insulation from the ground
Extras
First Aid Kit: Include blister care
Electrolyte Powder: Crucial for hydration
Power Bank: No outlets in the canyon
Dry Bags: Protect electronics and clothes from creek crossings
Cash: For café and store purchases (credit machines often fail)
What Not to Bring
Alcohol or Drugs: Strictly prohibited on tribal land
Drones: Banned by the tribe
Heavy Luxuries: You’ll regret carrying unnecessary weight
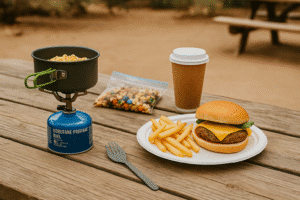
Food in the Canyon vs. Bringing Your Own
While Supai has a small café and general store, don’t rely on them for full meals.
Café: Fry bread, burgers, tacos, sodas, sometimes pizza
General Store: Snacks, bottled water, canned goods
Reality: Expensive and limited
Preparing Physically
The hike isn’t extreme, but it’s demanding—especially the uphill return. A little training goes a long way.
Cardio: Hiking, running, or cycling for endurance
Strength: Squats, lunges, core exercises for carrying weight
Practice Hikes: Do 6–8 mile hikes with a loaded backpack before your trip
Common Packing Mistakes
Overpacking: Every extra pound hurts on mile 7.
Forgetting Warm Gear: Nights are colder than you think.
Ignoring Sun Protection: Sunburn in the canyon is brutal.
Not Waterproofing Bags: Creek crossings can soak your stuff.
Traveler Reviews on Preparation
“We saw people hiking in jeans and flip-flops. Don’t be those people. Prepare properly.” – TripAdvisor
“Electrolytes saved my life. I saw others getting dizzy in the heat without them.” – TripAdvisor
“Hire a mule for your heavy gear if you’re not a strong hiker. It’s worth every dollar.” – TripAdvisor
My Packing Regret (and What I’ll Always Bring Now)
On my first trip, I skipped trekking poles to “save weight.” By the time I hit the switchbacks on the hike out, my knees were screaming. Now, I’ll never hike Supai without them. Sometimes, the smallest item makes the biggest difference.
Final Thoughts: Preparation Is the Key to Supai
If getting to Supai is half the adventure, preparing for Supai is the other half. With the right gear, food, and mindset, the 8-mile hike becomes not just manageable but enjoyable.
The effort may seem intimidating, but it’s exactly what makes the experience so rewarding. Supai isn’t supposed to be easy—it’s supposed to feel earned. And when you finally stand at Havasu Falls, mist on your face, turquoise water roaring in front of you, you’ll know every ounce you carried was worth it.